Ferris sweep split keyboard build
I built a Ferris Sweep split keyboard originated from the Datenspuren 24 souvenirs. Having a bit soldering experience and hacking curiosity, this was/is a great rabbit hole to explore.
Contents
Starting point
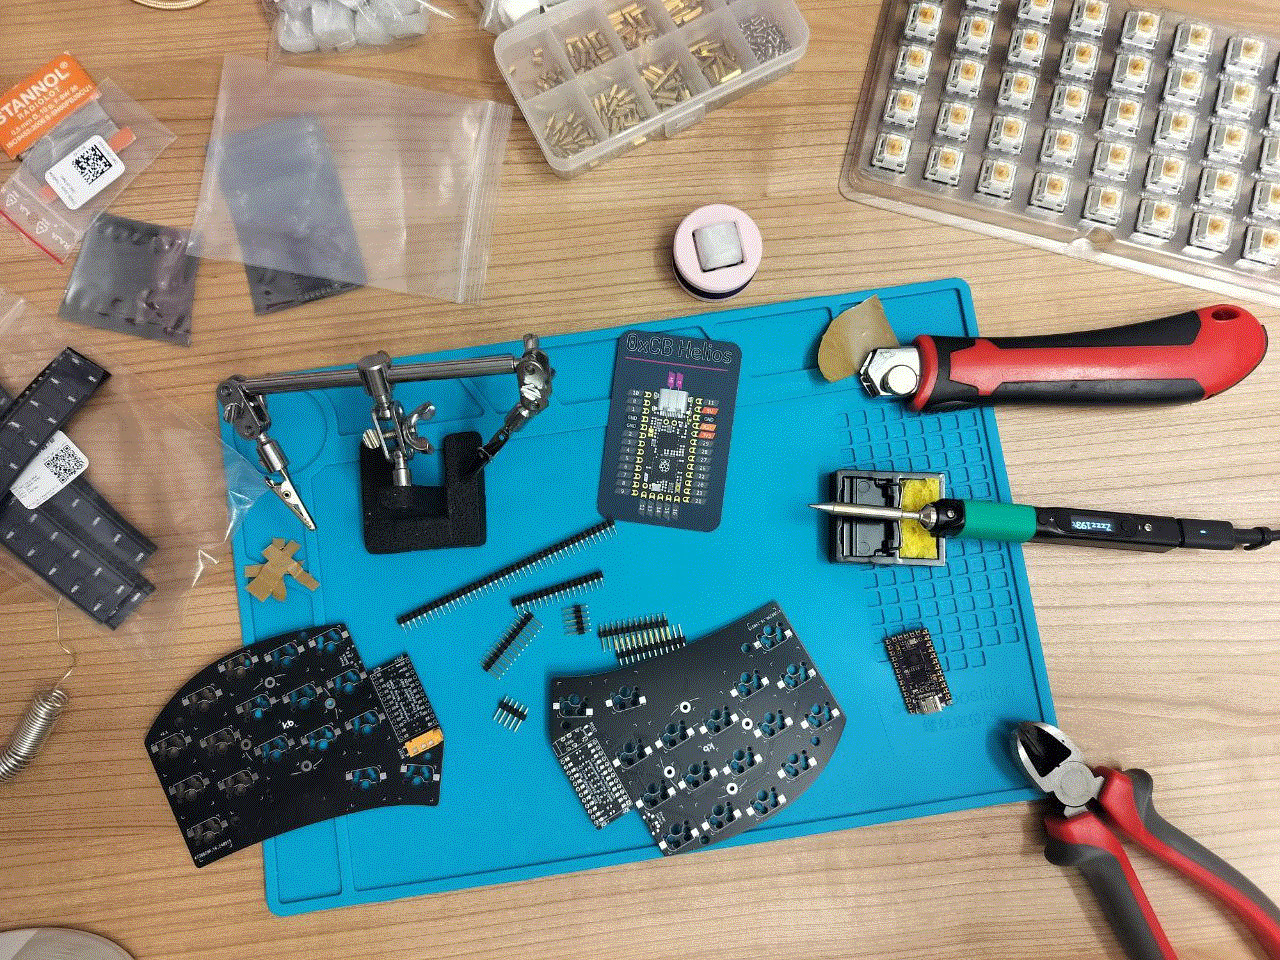
There are several Ferris Sweep variants out there. As I randomly chose this PCB at the keyboard-meetup of the last Datenspuren event, I first need to identify the variant. Due to the holes for MX Hotswap sockets1 it looks like the Bling MX one.
My soldering skills are rather mediocre and I have some problems with soldering SMD-sized components. This board luckily has mostly big pads or at least DIP elements. Only the optional reset switch is SMD-sized.
Preparation
Time to gather all needed components and tools.
Components
Based on the Bling MX BOM, the following components are needed:
- 2x pro-micro-compatible microcontroller, bought recommended1 0xCB Helios
- 2x pin header
- 34x MX switches
- 34x Kalih hotswap sockets
- 34x key caps
- 2x TRRS jacks
- 1x TRRS cable
- 1x USB-C cable
Some optional reset switches would be useful for later flashing the microcontroller, but this can also be achieved by shorting two pins with a screwdriver.
As the switch- and bottom-plate is missing, I looked out and found a 3d model for printing the case myself:
- Case model
- 6x M2 screws
- 6x M2 spacer
- some rubber feet
Tools
Soldering:
- soldering iron, bought recommended1 Pinecil v22
- solder tin3
- optional: sponge + stand, handy for laying down the hot soldering iron
- optional: silicon mat, makes every table to a soldering work bench without fear of burning the surface
Some other tools for assembly:
- screw driver
- side cutter, for shorting the pin header legs after soldering
Assembly
There are several tutorials out there, so I only describe things I stumbled on.
Close jumper pads on the opposite side

This was new to me and ambiguous:
- close pads on both PCB’s on the opposite side of the microcontroller, or
- close pads only on PCB opposite to the main one, while the circuitry might work different between left and right side
The first alternative sounded more reasonable, as both sides should be built up equally.
Orthogonal pin header
In order to place the microcontroller properly onto the pin header, those headers need to be orthogonal to the PCB. I used a breadboard to align them properly, but it was rather fiddly.
Pinecil
Soldering iron with ARM chip, why?
It turns out the iron is pretty smart and provides some comfort, even with factory settings. The tip was hot in seconds, cooled down to 150°C when layed down and heated up again when picked up.
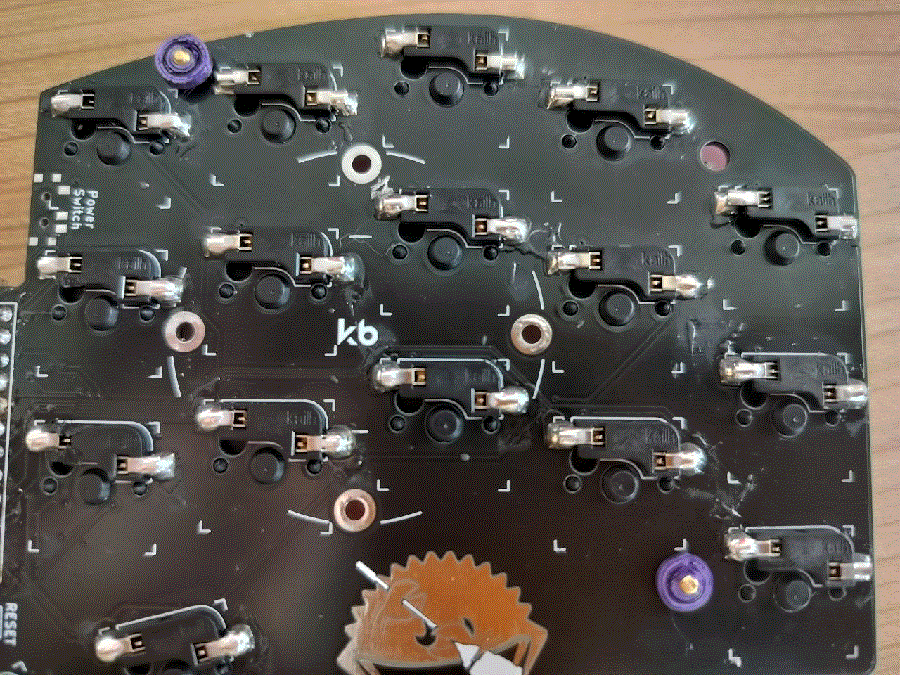
Despite the iron itself, the PCB was straight forward to solder. I really enjoyed soldering the hotswap sockets, due to the big pads.
TRRS shorting hazard
Neither connect nor disconnect the TRRS cable between the two sides while the USB-C cable is plugged in!
The TRRS cable drives the secondary side over the power supply from the primary one. Plugging in or out the cable can harm the components as it can short the power supply.
Flashing4
QMK is the firmware for such extraordinary human interface devices. The setup is straight forward until the installation of the proper crosscompilation toolchain for the arm-based raspberry pi chip RP2040 of the 0xCB Helios on Fedora. I ended up installing the following packages:
arm-none-eabi-binutils-cs.x86_64arm-none-eabi-gcc-cs.x86_64avr-libc.noarchgcc-arm-linux-gnu.x86_64binutils-arm-linux-gnu.x86_64arm-none-eabi-gcc-cs-c++.x86_64arm-none-eabi-newlib.noarch
Build the default keymap: qmk compile -kb ferris/sweep -km default -e CONVERT_TO=helios
Next step is to flash the microcontroller with our new firmware. Because my SMD-sized reset switches went missing, I used a screwdriver to short the GND with the RST pin in order to get the controller into flashing mode.
Then the controller get recognized as storage device. After copying our firmware onto the mounted device, it resets itself automatically ready to use the new mapping.
Chicken egg upate
The keyboard needs to be booted and mounted in flash mode to copy the new firmware onto it. While in flash mode the keyboard is not usable.
Predicing the storage device name, this can be automated like this:
sleep 10 && sudo mount /dev/sda1 /mnt && sudo cp personal/qmk/ferris_sweep_beginning_helios.uf2 /mnt/ && sudo umount /mnt
QMK
The Quantum Mechanical Keyboard Firmware (short QMK) is an Open-Source and highly customizable toolchain to build custom keyboard firmware. Some notable features that got my attention:
- custom keymap in its own repo, build via
qmk compile -kb ferris/sweep -km beginning -e CONVERT_TO=helios - combos: press multiple keys at once for a new key5
- layer: each key has multiple actions depending on the current layer, key modifiers are used to toggle a layer, e.g.
LT(layer, key)togglelayeron hold and send key as usual on tap - one-shot keys: tap key once, it stays active until next key press
- send string: send whole string like
returnon a programming layer - raw hid: communicate out-of-bound with host system via raw hid interface
- inherited keys: layers can inherit keys from upper layer when not needed
Own keymap
QMK provides a visual configurator to build up new and modify existing keymaps. Starting with the default map for the ferris sweep, I now want to add my first own layer and it should provide everything number-related. I came up with this:
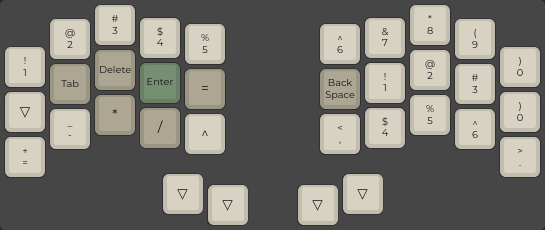
- top row numbers like on a common qwerty keyboard
- cursed num-block on the left side that integrates the top number row nicely, this way often used numbers in the programming context like 0,1,2 are on the home row1
- basic arithmetic operator and punctuation
Home row mods
The home row is the default finger position on the middle row, aligned towards the outer edge of each side.
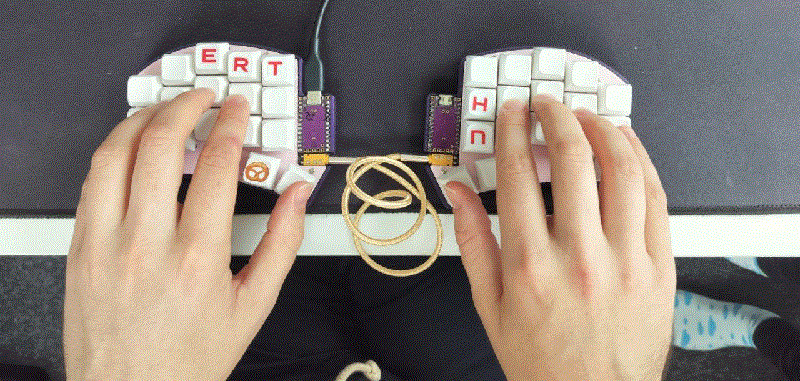
Mods are the “control keys” to access other layers and in general modify the context of other keys. Pressing them accidentally, can disturb the writing flow. It’s not only about pressing the wrong keys but also pressing them too short or long while keys with mods have different actions assigned.
Usually it is not recommended to add mods on the home row, to avoid false-positives, but with only 34-keys, its hard to avoid6 .
QWERTY
As a german I’m used to the QWERTZ keyboard layout. What I didn’t know is that every keyboard is doing QWERTY and the os is mapping it to the configured one.
Switching to QWERTY makes configuring the ferris via QMK much easier as the mapping stays consistent and doesn’t get remapped.
Impressions
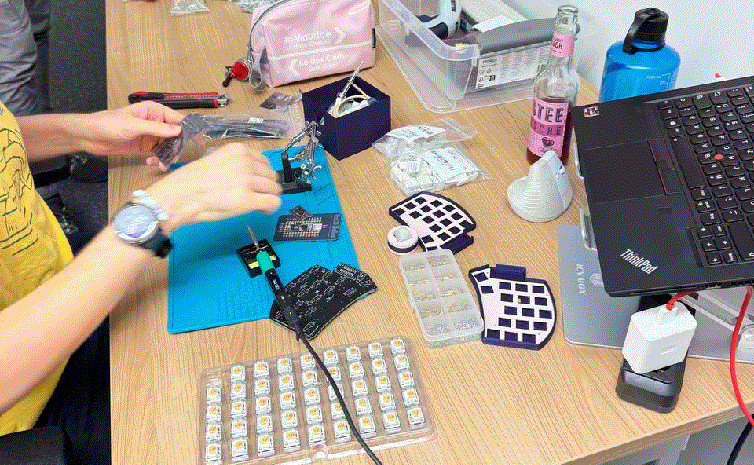 Me soldering together all the pieces.
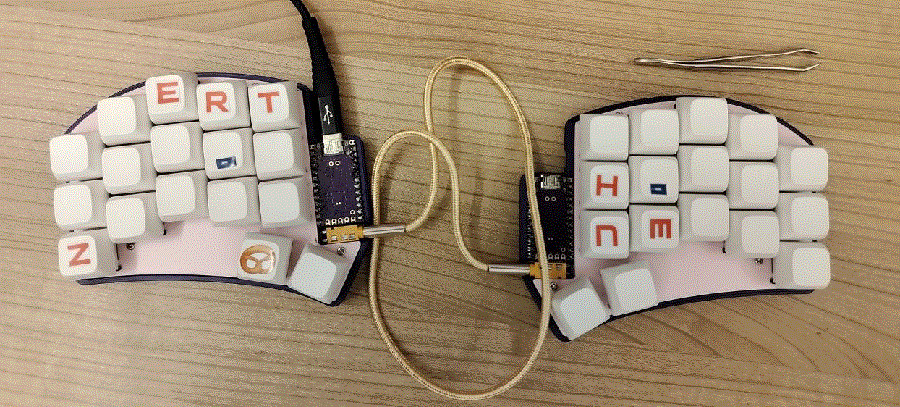
 The final keyboard with some sticker to help learning the layout. Pretzel-key is escape ftw.!
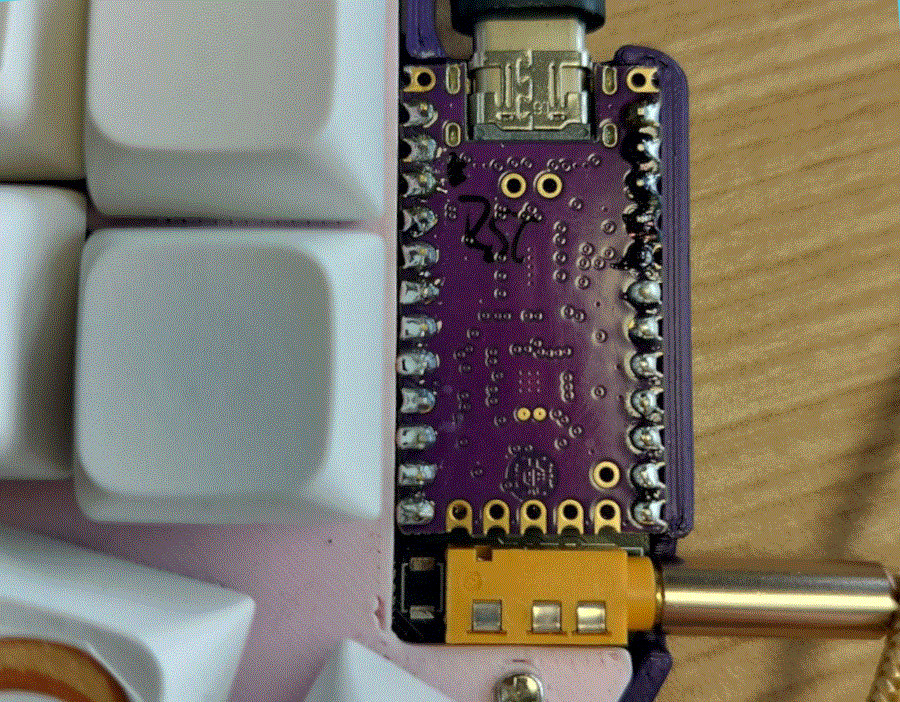 I really like the color combination of mictrocontroller and audio jack.
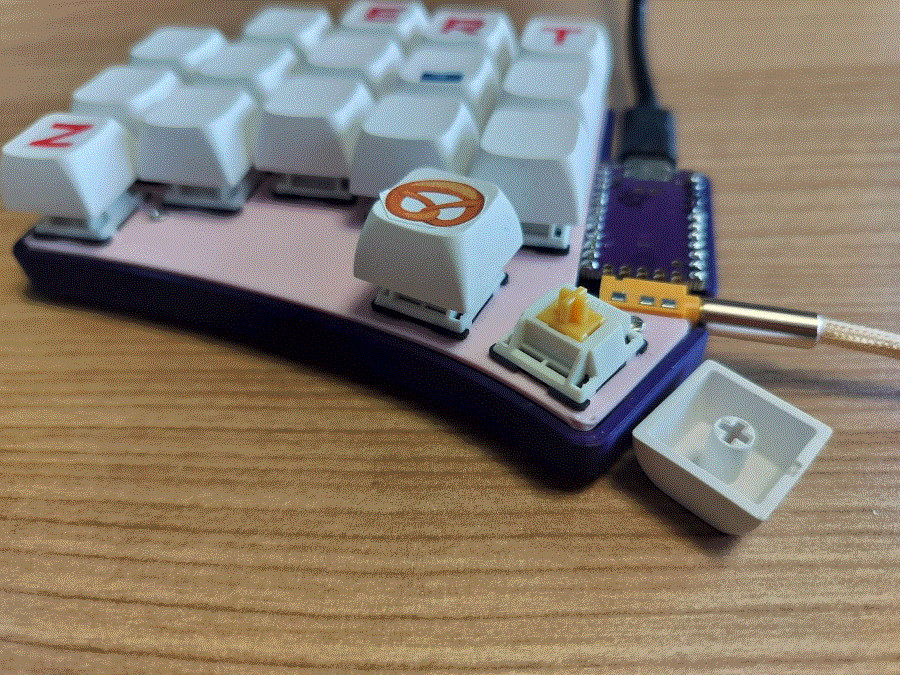 Under the switch
 Monkeytype result after four days
Summary
The assembly was easier and more fun than I expected. The keyboard booted up right away and I had more progress learning the new key mapping than I imagined. 10⁄10 rabbit hole exploration!
It’s still open if I use it as my main keyboard, as it’ll cost a bunch of time to gain enough muscle memory to work up to the regular speed again.
I’m already planing on improving the keycaps to minimize travel distance.
- Thanks to my split-keyboard guru/colleague for sharing knowledge, experience and recommendations!
- The last soldering iron got heated to death and its tip got loose. Attention: The pinecil needs and USB-C power supply with enough watts. A notebook USB-C power supply did the job well for me.
- Don’t know which is the right tin for the job. I like those tin pens, to minimize skin contact.
- Everything from here is written with the ferris sweep \o/
- There are special keycaps out there making combos more easily accessible by reducing the travel distance.
- See Home row mods